Pages

Wednesday 28 September 2016

Konflikt 47, If you go down in the woods today.....

My copy of K47 finally arrived after being lost by Royal Mail for a month.... nevertheless, it is here now and straight into action using my redundant collection of Secrets of the Third Reich miniatures.

The US have despatched a small veteran Rangers Command supported by light and medium walkers to investigate reports of some strange activity deep in the Ardenne. Die Totenkopf activity has been high and their is a suspicion amongst the US High Command that the German's maybe preparing yet another terror weapon.

Heinz Klopp (a seriously schizophrenic Professor of Rift technology) is indeed busy creating a new super-human soldier deep within the depths of an underground cavern beneath an innocuous looking walled farm in the Ardenne. SS Hauptmann Helga Muller has been assigned with protecting the facility at all costs and has assembled an ad-hoc assortment of troops around her with which to carry out her mission.

US Rangers
2nd Lt Oscar Fielder and platoon Medic lead two sections of Ranger Infantry supported by 1x Coyote Light Walker, 1x Jackal Light Walker and 1x Kodiak Medium Walker.

In support, Captain Samuel L Jackson leads a small unit of US Heavy Infantry in their battle suits.

German Forces
SS Hauptmann Helga Muller and her genetically modified 'twin' sister Olga lead the German Forces. SS Shocktroopers are supported by a huge Die Totenkopf squad and a small unit of FJR Falcons (with a supporting Mech).

In support are a unit of Schreckwulfen, a Gorilla Light Walker, The 'Thing' (a half human-half machine light walker), a Sniper Team and 2 Automaton MG's.

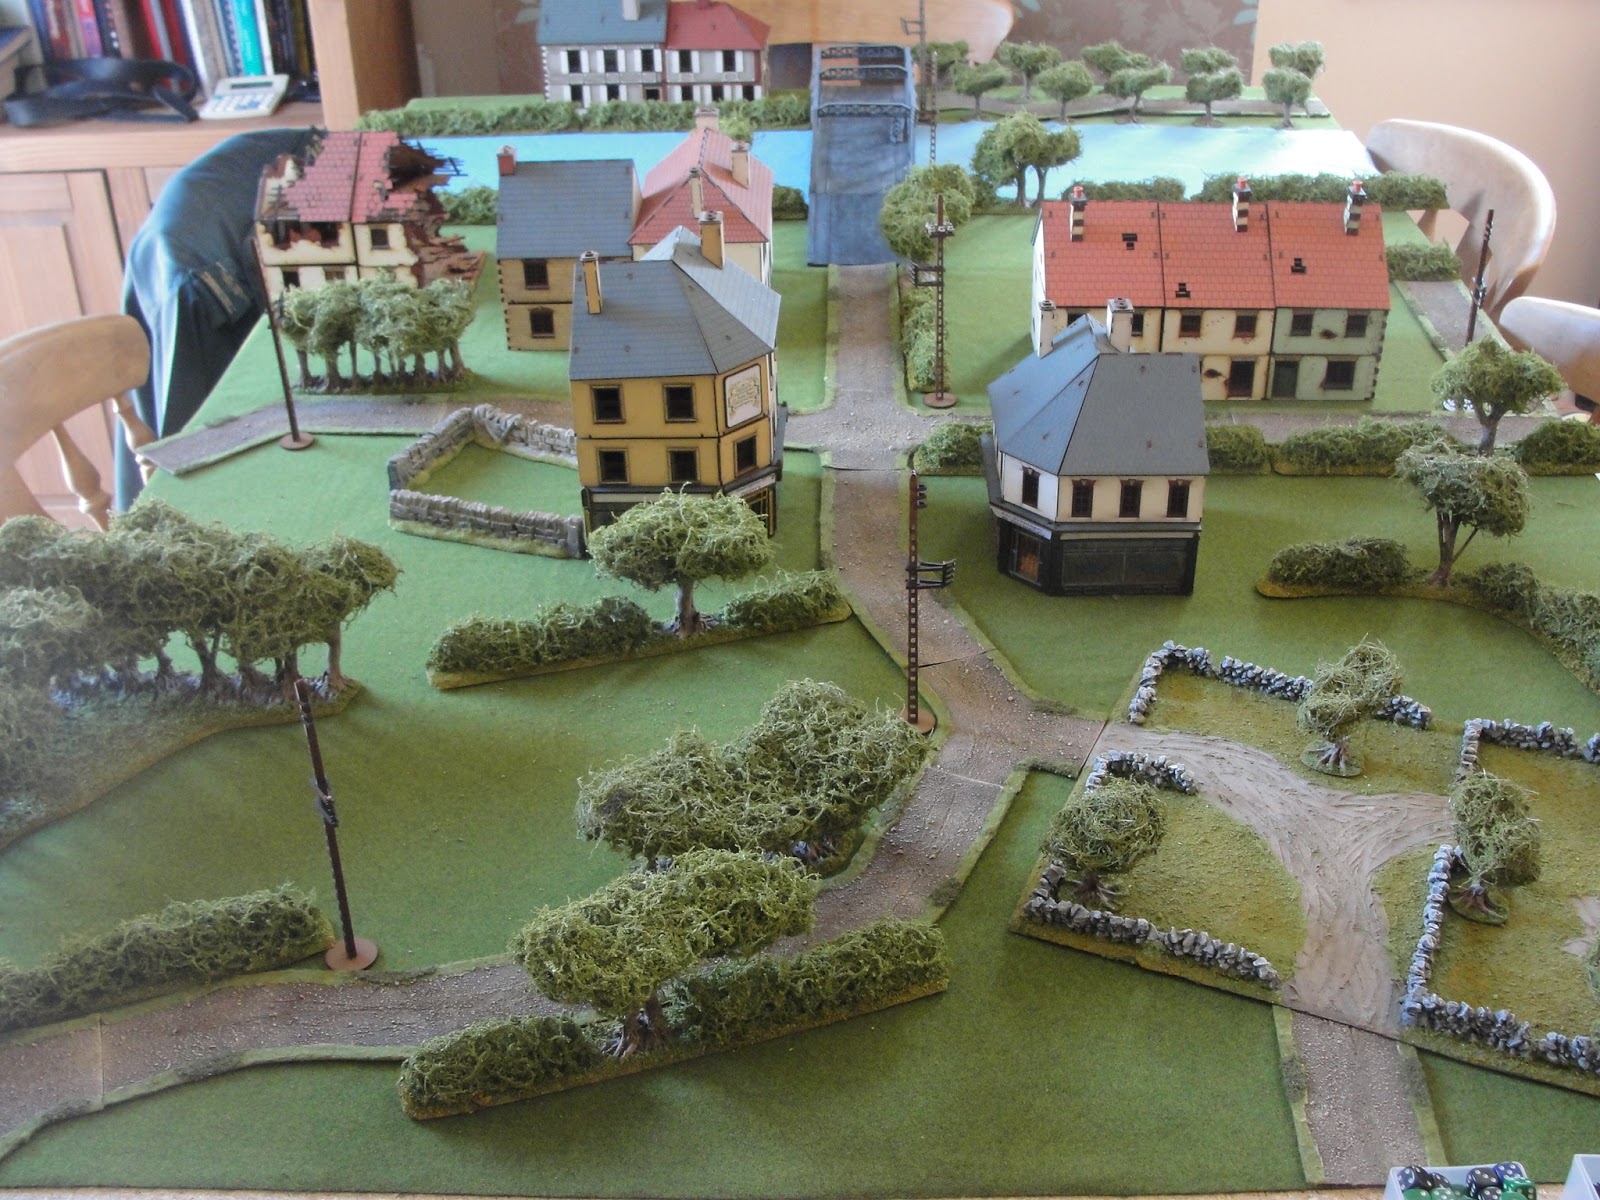
Rangers advance cautiously towards the farmhouse with support
from Walker Units as an FJR Flying Mech (need to think of a suitable name...)
and FJR Falcons move up on the right flank.

The FJR Mech, Falcons and Schreckwulfen with sniper
support attempt to outflank the Rangers

The Rangers 'frontal assault'

A Kodiak and a Coyote spot Karut Automatons in the farm gateway

US Heavy Infantry move up the right flank

The FJR Walker wreaks havoc amongst the Rangers

The Gorilla (half-human, half mech) advances on the right flank
to confront the Jackal Walker

The 'Thing', another half-human/half-mech
blocks the entrance to the farmhouse
Sadly at this point the camera packed up, just as the action was really hotting up. The Rangers were mauled pretty badly, largely down to having nothing with the capability to take down the FJR Mech. 

Although the German's held the farmhouse, other than the FJR Mech and the Gorilla, the surviving German forces were hemmed into the farmhouse and enough Rangers survived to make it back to base to confirm that whatever is happening at the farmhouse, the German's are willing to pay a heavy price for the US not to find out about it.

Captain Jackson's Heavy Infantry close in on a heavily wooded copse
(just before the camera packed up!)


Saturday 24 September 2016

Colombelles, June 9th, 1944

After successfully relieving D Cmpany of the Ox and Bucks at Pegasus Bridge, elements of 6 Commando have pushed on along the Caen Canal and the River Orne to secure further bridges.

Elements of the 192nd Panzergrenadier Regiment stationed at Cairon, have renewed their assault against the British keen to make good their failure of attempting to take Pegasus Bridge.

Elements of 6 Commando

Troop HQ
Lt Daniel Faringey (Senior Leader), Sgt Fraser Smith (Senior Leader), PIAT team and 2" Mortar Team and Sniper

No1 Section
Cpl Sidney Squires (Junior Leader), LMG Team, Rifle Team

No2 Section
Cpl Fred Cooper (Junior Leader), LMG Team and Rifle Team

No3 Section
Cpl Stanley Whitaker (Junior Leader), 2x LMG Team and Sniper

Troop Support

  • 2Lt Arthur Sykes, FAO and 3" Mortar Team
  • Cpl Oliver Mount (Medic)


Elements, 192nd Panzergrenadier Regiment

Platoon HQ
Leutnant Willi Schneider (Senior Leader) and Panzerschreck Team

Sections 1-3 (identical - led by Obergefreiters (Junior Leaders) Hans Zupp, Paul Schmall, and Hermann Zeitsfrei.
1 LMG team and three riflemen and 1 LMG team and two riflemen. Two panzerfausts per section.

Platoon Support

  • Leutnant Franz Blindz, FAO and 81mm mortar team
  • Obergefreiter Karl Scmidt (Medic)
  • Regular Heer Infantry Section led by Obergefreiter (Junior Leader) Zelig Weber, 1x LMG team and 1x Rifle team including 1x Panzerfaust.
  • 1x Sdkfz 251
  • 1x Sdkfz 251/9 Stummel, led by Obergefreiter (Junior Leader) Franz Mueller

Collombes, with the Orne Bridge (objectives for the Germans - top centre)
viewed from the 192nd PzGren Btn start line in the West
Obergefreiter Hans Zupp's No1 Section comes under fire
from the stone cottage. Puffs of rifle and LMG fire can be seen in the windows
Obergefreiter Schmall's No2 Section is pinned with casualties as
the Commando Forward Observer calls for artillery support.
Leutnant Blindz the Artillery Observer advances to take up a spotting position
as Medic Obergefreiter Scmidt attempts to make contact with Schmall's men
near the Grocers.
Hans Zupp's section gets into the blind-spot of the stone cottage
attempting to outflank the British.
Cpl Sid Squires section advance on the row of terraced houses
with Cpl Franks the Medic
Squire's section heaps misery on Schmall's men behind the hedgerow
Lt Faringey arrives with PHQ in support of Squire's forward
position in the terraced houses.
German reinforcements arrive in the shape of Obergefreiter Weber's
Infantry who aim to help the flank assault.
Zeitsfrei's 3rd Section move up in their halftrack
The 192nd are thwarted once more by a second artillery barrage which kills
Schmidt the Medic and pins bot the 3rd Section in their halftrack and the Stummel
which has spent most of the game attempting to suppress the Commando's
in the stone cottage.

German morale collapses.


Monday 5 September 2016

Colonial Marines and Aliens for Sale

The following figs up for sale - Pendrakens stunning Colonial Marines and Aliens. Painted and based.

Aliens:
3 'Queen command stands'
32 stands of aliens
12 stands of facehuggers

Predators x10

Colonial Marines:
APC Command Stand
Ripley/Bishop command stand
Colonial Marine dismounted command
3x APC
4x Tanks
10 stands of colonial marines
6 stands of colonial marine heavies/sentry guns