Pages

Tuesday, 14 June 2016

Springing the trap. Sharp Practice 2. AWI

My good friend Nick B fought out this AWI skirmish at the Sudbury and District Wargames Club last week. Both of us have a few games under our belt now and talking of belts, this was a belter of a game, full of character, twists and turns and lots of friendly banter as we both got into taking on the persona of our commanders.

Set sometime after 1778, the Rebellious Colonials had set a cunning plan (so cunning you could have put a tail on it and called it a fox....) in which they aimed to draw the British out and then defeat them with superior numbers. Only yesterday the Rebels had managed to capture the 44th Regiment of Foot's Colonel's Daughter Lady Victoria Pendleton-Pennyfarthing (known affectionately to the lower ranks as Vicky Pendleton-pushbyke for her various 'encounters' with one of the Regiments Farriers.)

The Rebels are holding Lady V.P.P captive in a small village and are using her as bait with her suitor, the Honourable, but impoverished Lt Tarquin Foster-Smythe, Company commander of the 1st Company 44th Line.

The Raggedy Rebels
Captain Donald Trumpington (Status II Leader)
Sgt Ben Smythe (Status I Leader)
Musician
Three Groups of State Line with Muskets

Lt Hillary Clinton (Status II Leader)
Three groups of Rebel Militia with Muskets

Sgt Jeffrey Arsington (Status I Leader)
6 Rebel Militia Skirmishers

Sgt Bill Hook (Status I Leader)
6 Rebel Militia Skirmsihers

Sgt Fulton Mackay* (Status I Leader)
One group of 8 state line with muskets

*Sgt Mackay's group are defending the captive

On the whole, the raggedy rebels are an honourable bunch, many of whom have taken a liking to young Lady V.P.P, however the Foreign Johnnie Rotter Trumpington has designs on the young British strumpet and is in no mood to let the British have her.

The Gallant British
Lt Tarquin Foster-Smyth (Status III Leader)
Doc Quack (Physic)
Two groups of 8 Regular Muskets

Sgt Ben Dover (Status II Leader)
Cpl Phil MacRackup (Status I Leader)
Two groups of 8 Light Infantry in Line with muskets

Cpl Richard 'Dickie' Head (Status I Leader)
One group of six light infantry skirmishers

The British although being a largely honourable bunch, are amongst some of the dullest and most thoroughly vile and dislikeable rogues the 44th can muster - it would seem (on the face of it at least) that Foster-Smythe's men might be the perfect men to take on such a task, that of putting the Rebels to the sword and freeing the Colonels daughter.

The view from S to N. Lady V.P.P is held in the building
in the far NE corner of the battlefield atop a grassy hillock.
The Rebels have taken up blocking positions along the
Eastern half of the battlefield to prevent any quick
escape by the British. In the foreground, Sgt Ben Dover's
Light Infantry protect the British lines of escape.

The view N to S. Lady V.P.P is held captive in the
farmhouse under the watchful eye of Fulton Mackay's men.
Lt Foster-Smythe deploys his Line Infantry at the foot of the hill
out of sight of the objective hoping to rush the farm and overwhelm
the defenders. Just out of shot Dickie Head's Lights provide covering
fire on the farm rattling the defenders.

Foster-Smythe's Line and Dickie Head's Lights
creep up the hillock to head for the objective. The game is up
as the lone sentry spots their advance and reports back to
Fulton Mackay who orders the doors of the farm to be barred
and barricaded.

Another view of the objective and Foster-Smythe's assault.
Arsington and Hooks Rebel Militia Skirmishers hold the woods
South of the farm awaiting reinforcements.

Dickie Head's Lights pour fire into the farm which rakes
Fulton Mackay's group piling on the shock and slowly
whittling his numbers. Foster-Smythe's men tardily
sit at the foot of the hillock which gives the rebels time
to react sending their skirmishers on a flanking manouvre.

Trumpington's State Line trade fire with Ben Dover and Phil MacRackup's
Light Infantry on the hillock. The sheer weight of rebel fire causes
considerable panic amongst the British who reel under its savagery.

Clinton's Militia arrive in the nick of tme and immediately move
up in support of Hook and Arsingtons skirmishers who have
got around the flank of Foster-Smythe's Line to wreak havoc.

Embarassingly for the British, Clinton's Militia get in the first
volley which wreaks havoc in the British Line. The embarassment is
further compounded as Foster-Smyth leaves his flank open to engagement
by the rebel skirmishers who make good their advantage piling on the shock.

Dickie' Head's Lights assault the farmhouse wiping out the defenders
and secure the objective freeing Lady V.P.P but it is too little too late...
Although the British managed to achieve their objective, the victory was thwarted by the Rebels who had reduced the British support to complete ineffectiveness. With morale dropping faster than a lead balloon, Lt Hillary Clinton challenged Dickie Head to a duel which went horribly wrong for Head as Head literally lost his head outwitted by the superior sword skills of the Militiaman.

Foster-Smythe's line ran ragged, retreating from the field without even loosing a single volley whilst Ben Dover's light were reduced to a few survivors fleeing for their lives.

Lady Victoria Pendlenton-Pennyfarthing remains firmly in the hands of the Rebels and awaits the advances of Trumpington with a sense of dread.

Friday, 10 June 2016

Sharp Practice - Liberation at Liberty Manor

Ever the opportunist, Lt Johnson Barrie, a subaltern of the Independent Company 3rd Virginia State Line, has heard rumour of a British Pay Chest being transported through the farmlands of Dinwiddie. Far from being a career soldier, Barrie has joined the Rebels to line his own pocket and he sees this as a golden opportunity to further his ill-gotten gains.

Gathering a band of 'Foreign Johnnies' of similar ilk around him, he sets off to intercept the column as it approaches Liberty Manor and its farmland.

Sundry Rebels
3rd Virginia State Line (Independent Company) 
Lt Johnson Barrie (Leader Status III)
Colour Party & Musician
Two groups of 8 State Line Troops with muskets

Sgt Jonah Wales (Leader Status II)
Two groups of 8 State Line Troops with muskets

The Virginia Militia
Francis Peartree (Leader Status II)
Two groups of 10 Rebel Militia with Muskets

Rebel Militia Skirmishers
Isaac Greene (Leader Status I)
One group of 6 Rebel Militia Skirmishers with muskets

Rebel Militia Skirmishers
Oliver Franks (Leader Status I)

One group of 6 Rebel Militia Skirmishers with muskets

Jonah Wales is of similar ilk to Barrie but has gained a reputation as an effective NCO, affable and popular but a rogue none the less. Unlike Barrie who would rob his own Grandma, Wales is plagued by a conscience and will only plunder from the enemy which makes a British Pay Chest fair game.

Francis Peartree is a home boy, renowned locally for his boyish good looks, rippling muscles and distinct lack of 'anything upstairs'. Barrie has secured his services as the brawn of the operation.

Isaac Greene is a thoroughly despicable rogue who although fair of face is vertically challenged suffering from small man syndrome.

Oliver Franks is another disagreeable rogue, a complete coward and not surprisingly sickly and weedy in stature. A right sneaky chap of questionable fatherhood.....

The British
Elements of the 2nd Company, 14th Foot Regiment
Lt Thomas Singer (Leader Status III)
Three Groups of 8 Regulars with muskets

Sgt Gordon Stark (Leaders Status II)
Two Groups of 8 Regulars with Muskets

Cpl John Winkler (Leader Status I)
One group of 6 Light Infantry Skirmishers with muskets

Sgt Sidney Maxwell (Leader Status I)
One group of 6 Light Infantry Skirmishers with muskets

Lt Thomas Singer is a new subaltern who recently replaced the company commander who was killed in a recent battle. Untested and therefore mistrusted by his men, he is also shunned by his peers because of his apparent impoverishment. Singer is only in the Army as his new father in law purchased his commission in a bid to ensure his new son in law is as far away as possible from his daughter whose marriage he disapproved of.

Gordon Stark is a career soldier widely respected by both his men and his peers. Although small in stature he is pleasant of nature and of honourable intent, both attributes which ladies find most appealing.

John Winkler joined the army as a 13 year old to escape the life of an unwanted orphan. A sickly cove of very simple stock and unfortunate looks, he is a good NCO who is well thought of by his men.

Sidney Maxwell is a freakishly ugly brute of a man with low moral values that is as thick as an elephant omelette. He fits in well with the brutal nature of campaign life on foreign shores and is not beyond a bit of pillaging be it friend or foe.

The view S to N with Dunwiddie Farm in the middle distance
and Liberty Manor in the NE. The British must move the pay chest
off the Southernmost table edge to secure victory.
 (Leader  (Le
The initial British Deployment. Sgt Maxwells men approaching
Liberty Manor keen to determine if the enemy are in the area.

Sidney Maxwell turns on the charm with Miss Elizabeth Ardleigh-Swan,
Homeowner of Liberty Manor. Clearly no lover of the British, Miss Ardleigh-Swan
rebukes the offensive brute with a tirade of unintelligible colloquiolisms that Maxwell
fails to comprehend given his distinct lack of intelligence. Thankfully his men drag him away
from the attractive young women before he decides to take a different course of action.

John Winkler fares rather better with Jeremiah Mowitch,
a 'Poacher turned Gamekeeper' who reveals that enemy forces are
indeed in the vicinity, believed to be approaching from the SW.

Winkler's Lights set off for the SW to intercept the approaching rebels
as the main body makes good progress along the cart tracks.

Maxwell's Lights strike out for the Woods in the SE corner in
support of Cpl Winkler. The Rebels are in for a shock.

Lt Singer leads the main body along the cart track supported by
Sgt Stark in the rear.

Isaac Greene's Rebel Skirmishers enter the fray and open up on
Winkler's Lights in the farmyard causing a point of shock

At the end of phase 1, the entire Rebel force is on the field but is boxed
into the SW corner of the battlefield. Franks Skirmishers trade fire with
Sgt Maxwell's Lights in the woods as Lt Barries State Line move to the woods.
Sgt Wales's State Line move to support Greene's Lights in their skirmish
with Cpl Winkler's Lights and Peartree's Militia provide support in depth
for the Rebel line.

Greene's Skirmishers attempt to outflank the farm whilst Wales's State Line trade
fire with Winkler's Lights in the farm. Winkler's men with their superior training
create enough confusion within the State Line troops that their formation is
forced to break up into smaller bodies making them harder to control.

Greene's Skirmishers get around the flank of Winkler's Lights

Keen to make a name for himself (and realising the gravity of the
situation in being vastly outnumbered) Winkler leads his Lights
in a charge against Greene's skirmishers and puts them to flight at point
of good old fashioned British Steel....

In the middle ground, Lt Singer shakes his main body out into line
in support of Winkler's Lights and sends his third group of Regulars
to protect the Pay Chest with orders for them to move behind the
Eastern-most woods behind Maxwell's Lights. Sgt Stark's Regulars
make slow progress towards the farm. Wales's State Line push forward
in support of Greene's Skirmishers threatening Winkler's flank as Barrie's
State Line struggle through the woods. 

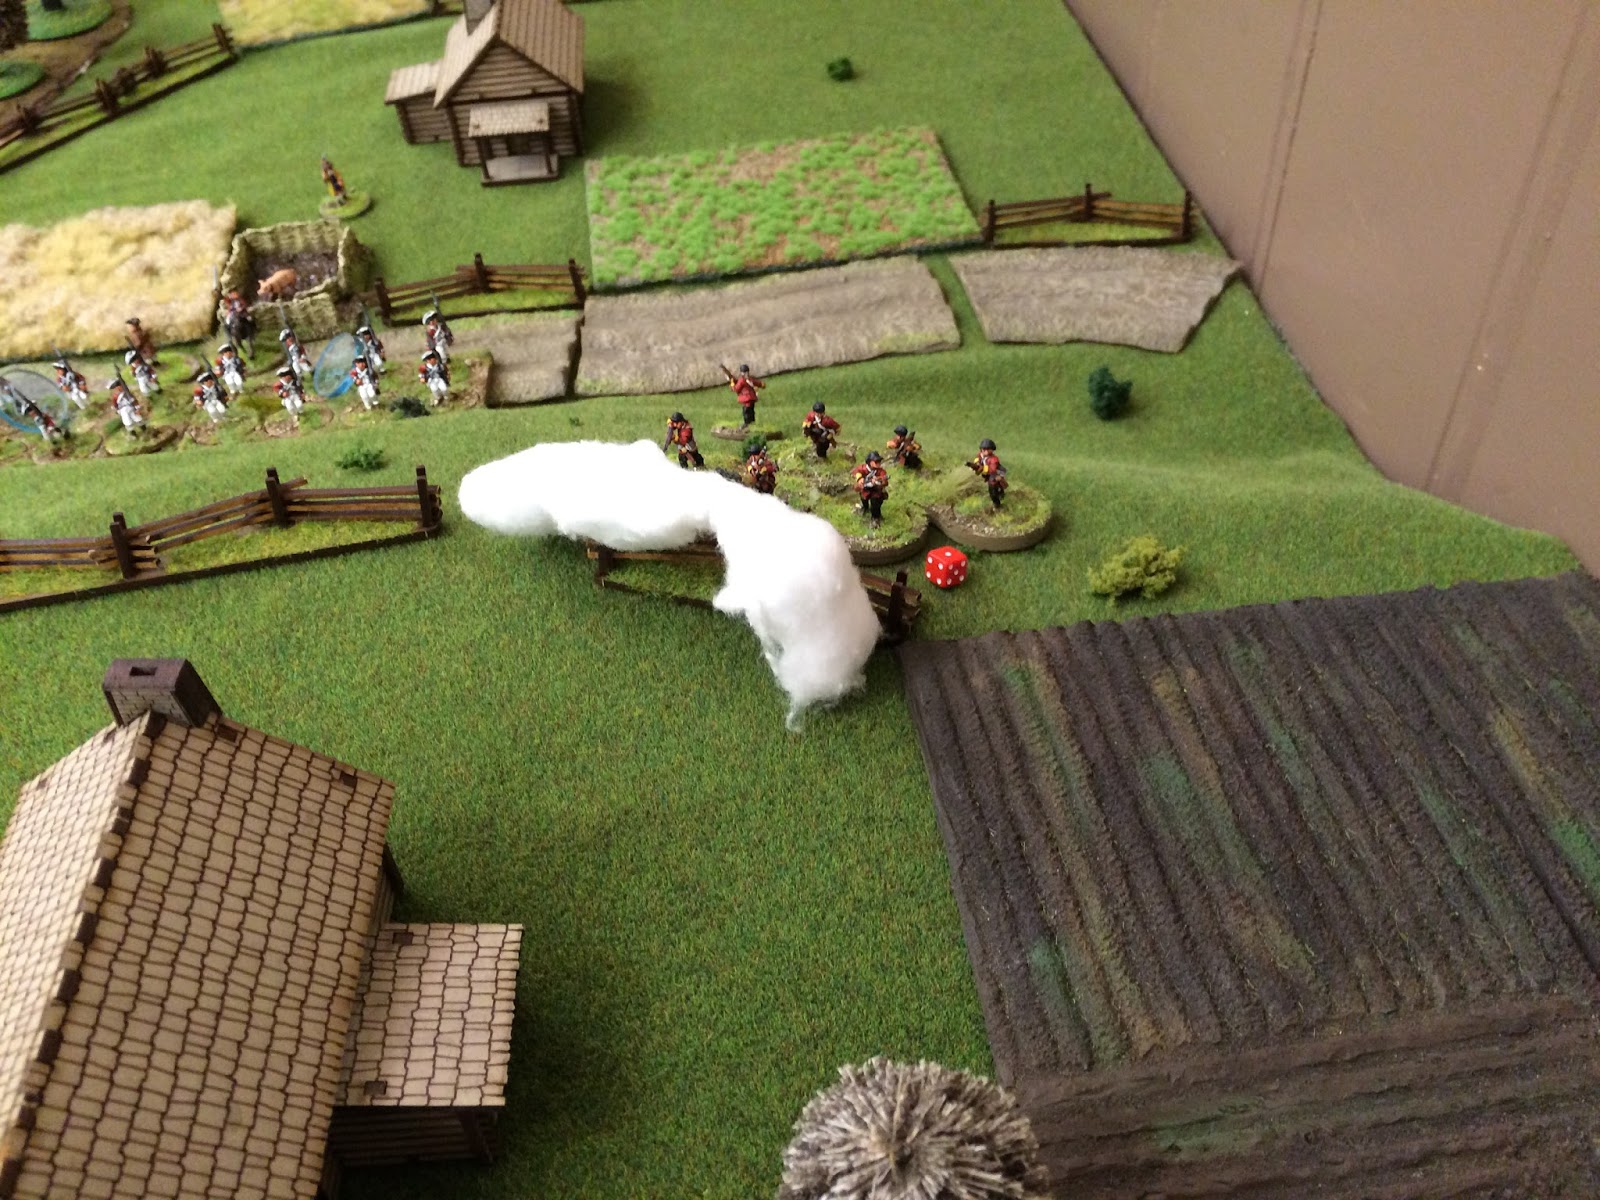
Wales's State Line trade shots with Winkler's Lights in the Cornfield.
Greene's Skirmishers (out of shot) can't contribute to the fight
as they are still reeling from Winkler's charge.

Franks Skirmishers break cover to head for the Eastern flank to cut off the
Pay Chest Party and Barrie's State Line finally push through the woods in
support. Lt Singer's main body presses forward in line to take on the Rebels
in the centre as Stark's Regulars push on through the farmyard.

Winkler's Lights withdraw for a breather as Stark's Line finally reaches
the farm to provide support. A well controlled volley from Singer's Regulars
forces Barrie's line to break formation as Peartree's Militia move up in support 

Although being outgunned and outnumbered, Franks Skirmishers reach the
Eastern edge of the battlefield cutting off the Pay Chest escort buying Barrie time
to defeat the British in the centre. 

Stark's Regulars unleash a devastatingly accurate controlled volley
which decimates one of Wales's State Line Groups

Whilst Winkler's Lights once again charge Greene's Skirmishers with
unsurprising results. Greene narrowly escapes with his own life, his command
wiped out to a man.


Singers Main Body deliver a controlled volley against Peartree's Militia
forcing the formation to break and wounding Peartree in the process. The volley
is immediately followed in the subsequent phase with a Thin Red Line command
which further reduces the Militia's number. Fortunately for the Militia the
British come up just short of the their target and are now unloaded....
Stark's line pour more misery on Wales's State line forcing a group to break for the rear.

Rebel Morale begins to crumble.

Barrie's State Line finally find themselves with a field of fire and deliver
an effective volley which combined with volleys from Peartree's Militia
decimates the British Main Body. Wales's remaining State Line group turn to face Winkler's
Lights who once agin withdraw to the relative safety of long distance behind the cornfields

Singer moves forward and with a very favourable run of Command Flags
rallies off a massive six points of shock steadying the Main body. Stark's Line pours fire into
an isolated group of Peartree's Militia who break and head for the rear.
Rebel morale continue's it's steady decline.

Lt Singer having made an admirable job of steadying the line, leads the survivors
in a charge against the rattled Militia whom unsurprisingly break leaving Francis Peartree
unconscious to be captured by the British. Rebel Morale completely collapses and Barrie's
force flees the field in complete disarray.
The British secured a crushing victory over the Rebels who struggled to make good their numbers being hemmed into a small corner of the battlefield. Of the Rebels, only Sgt Jonah Wales showed any real zeal but his forces were whittled down by some very effective skirmishing and controlled volleys delivered by the British.

Cpl John Winkler deserves a special mention. Massively outnumbered in the early stage of the battle, his boldness in taking the fight to the Rebel's gave time for Singer and Stark to engage the Rebel Main Body. His complete disregard for his own safety deserves special merit as not once, but twice did he personally lead a charge at point of bayonet, therefore blighting the Rebel attempt to turn the British flank. His men were a constant frustration to the Rebels with their long range sniping and tied up a significant proportion of their men allowing the British Main Body time to deploy from Column to Line. Gallantry medals were not even thought of for rank and file by the aristocracy, but had they been, Winkler would certainly have been in line for recognition. Lt Singer did see to it that post battle Winkler's food and rum ration was doubled which might help with his weedy constitution!

Lt Singer also impressed in this battle. With the main body beleagured by some very effective Rebel firepower, Singer's handling of the situation was exemplary in rallying in line and pushing on through the Rebel line to secure a convincing victory as well as capturing one of the Rebels significant local leaders. Post battle his peers begrudgingly welcomed the new Subaltern into the mess, whilst his men began to see him in a different light - maybe this fop might one day make a decent officer.......

Friday, 3 June 2016

Bloody Big Battles - Spicheren (FPW in 6mm)

My first outing with Bloody Big Battles and on the recommendation of others playing the game I chose the Franco-Prussian War Battle of Spicheren, 1870.

For BBB this is a small scenario with 25-30 stands per side which was ideally suited to a first game.

The Prussians are on the attack.

The view of the battlefield from South to North, with Forsbach and
Striling Wendel in the foregroun, Spicheren in the middle distance and
Saarbrucken in the distance from where the main Prussian advance would start

French positions around Forsbach

French positions on the Pfallenberg Heights overlooking Spicheren
and the advance French positions in the Rotherberg

Prussians advancing through Saarbruken in support of the
assault against the Rotherberg.

The battlefield viewed West to East with the railway embankment
running parallel with the road to Forbach

The Prussians close on the Rotherberg as French reserves in the South
sally forward in support of the defenders of Stirling Wendel. The French
have left Forbach undefended.....

The bottleneck develops as Prussian forces mill around in the valley.
The French defence of the Rotherberg looks solid.
Prussian and French cavalry skirmish in the centre.

The Prussians 'shake out' their lines in the centre as the assault on
the Rotherberg gains momentum. Prussian and French cavalry continue
their skirmish in front of Stirling Wendel, but the French give ground.

The Prussian assault on the Rotherberg develops as one unit of French
retires spent leaving the remainder of the brigade very exposed

The view NW to SE showing the French resistance on the Rotherberg
beginning to crumble as the Prussian Cavalry see off their French enemy
and exploit their success riding down an exposed artillery unit East of
Striling Wendel

With their supporting artillery run down by Prussian Cavalry,
the defenders of Stirling Wendel taste Veteran Prussian Bayonet
steel and unsuprisingly beat a retreat through the town.

Prussian reserves arrive in the South and move into Forbach unopposed.
The French rue their decision to leave the town undefended.

The French defending the Rotherberg are beaten back
with horrendous casualties leaving Spicheren wide open.

Prussians advancing on Spicheren

The Prussians push on past Stirling Wendel threatening the French
centre from both North and South.

The Prussians hold 4 of the 5 game objectives in Turn 9 with
Stirling Wendel still being contested

Tuesday, 10 May 2016

Sharp Practice 2 AWI

Finally got around to basing my collection of AWI for Sharp Practice 2. Most were already on sabots for Muskets and Tomohawks and there are still multiple units for both sides to base up including Hessians, French and a small number of Tories but this little lot will give me more than enough options to field various combinations to keep me going for a while.

In the pipeline, I'm looking to expand the collection to include more French (Coureur du Bois/Compagnie du Marines etc) so I can also game the French Indian Wars. I will also add Civilians (pivotal in SP2) and more Indians as I go and I will need to add some carts and wagons to give both sides something to plunder.

Sharp Practice has really caught my imagination. the game lends itself to LOA, Napoleonics and even Indian Mutiny. As I will likely be collecting both sides for any conflict I try out I am likely to be looking to 10mm or 15mm.